ZURI-CHALK Digital HandbookWelcome to ZURI-CHALK 🌿
Your complete guide to the classroom platform for Teachers, Learners and Parents — lessons, the Annual Teaching Plan, worksheets, report cards, ChalkMate AI tutoring, the Chalky AI Learning Studio, live classes, voice notes, portfolios and more.
For Teachers
You're the one running the classroom — and the school. As the teacher you own your ZURI-CHALK space as the super admin: set up and manage the school from the School page, plan lessons against your Annual Teaching Plan, keep the attendance register, invite learners and parents in-app or on WhatsApp (with codes and PINs for the little ones), build worksheets, mark work, publish report cards, assign learning games in PLAY, and keep everyone in the loop with live classes, voice notes, Messages and the school calendar. Every teacher in the school can view and edit everything in it, so a colleague can always step in for you.
1. Getting started2. School settings (owner tools)3. Classes, inviting & messaging4. Attendance register5. Annual teaching plan (ATP)6. Lessons & tasks7. Weekly timetable8. Worksheets9. Assessment planner & guidelines10. Marking, report cards & portfolios11. Live classroom, calendar & materials12. Little ones (code + PIN sign-in)13. ZURI-CHALK PLAY14. Messages15. ChalkMate oversight16. Voice notes17. Resources, forum & appointments18. Chalky AI Learning Studio19. Billing
1
Getting started


- 1Register with your email and set a password. Check your inbox for the verification code and enter it to activate your account.
- 2Set up your school profile: school name, teaching language, curriculum, academic year and terms.
- 3Complete your curriculum profile when prompted — it links your classes to the right programme and assessment body (CAPS by default).
- 4Your dashboard is home base — it shows today's lessons, upcoming events, pending approvals, due dates and announcements at a glance.
TipYou only set up the school once. After that, every new class you create belongs to it automatically.
2
School settings (owner tools)


There is no separate administrator role — you, the teacher, own the school space. Everything school-wide lives on the School page in your menu:
- 1Open School from the menu. First visit creates your school: name, logo, teaching language, academic year and terms, and whether new enrolments need your approval.
- 2Curriculum & programmes: CAPS is the default — add Cambridge, IB, IEB and other programmes, then confirm the subjects your school offers per grade (teacher proposals from the Classes page are approved here too).
- 3People: review pending access requests, set each person’s role (teacher, learner or parent), and invite a parent to a learner’s portfolio with a private child-specific code.
- 4Announcements: post school-wide notices — exam timetables, sports days, parent evenings — they appear on every Today screen in your school.
- 5AI tutor settings: manage ChalkMate’s approved sources, review reported errors and withdraw any unreliable answer.
- 6Shared editing: every teacher in your school can view, edit and remove all school records — lessons, tasks, worksheets, marks, report cards, portfolios, class lists, calendar and more — so anyone can pick up a colleague’s class without waiting.
- 7Preview as role: switch your own account to learner or parent to walk through their screens, then switch back to Teacher.
Real example
Post "Term 2 exam timetable is up" as an announcement, approve the isiZulu Grade 9 subject a colleague proposed, and confirm the Cambridge programme — all from the School page in one visit.
TipYou own the space: every school-wide setting, approval and announcement is yours to manage — and every teacher in the school shares full editing rights over its records, so nobody is ever blocked.
3
Classes, inviting & messaging


- 1Create a class: give it a name, grade and subject (e.g. "Grade 5A Mathematics").
- 2Open the class page and use the Invite card — in-app comes first: "Invite learners in-app" and "Invite a parent in-app", then the two WhatsApp buttons.
- 3In-app invites land straight in the Messages inbox of anyone who has already signed up but hasn’t joined the class yet — one tap to send, no phone numbers needed.
- 4For everyone else, use the WhatsApp buttons: paste learner numbers and each learner gets a WhatsApp with a personal join link — nothing to type or copy.
- 5When a learner taps the link, they're taken straight into your class and placed in "pending approval" — even if they've never signed up before.
- 6Review pending enrolments on the class roster and approve or reject each learner.
- 7For parents, use Invite a parent in-app or on WhatsApp — both send a one-click link (or a private code) that pre-fills everything; the parent just confirms the privacy consent and they’re linked.
- 8For young learners, tap Set up code + PIN sign-in to give them a sign-in code and PIN — any grade, no email needed.
Real example
Two learners already have accounts — tap Invite learners in-app and both get the join invite in Messages. For the other five, paste their WhatsApp numbers and send the links.
Good to knowThe Invite card keeps a sent-list showing every invite and its status: sent, joined (learner enrolled) or linked (parent verified). Invites go out in-app or on WhatsApp — never email.
4
Attendance register


- 1Open the Attendance tab on a class page and pick the date — the register pre-fills itself from the full class list, like a paper register.
- 2Set each learner Present, Late, Absent, Excused or Left early — colour-coded dots match the paper register: green, yellow, red, blue, orange.
- 3Add a reason where it helps ("joined 10 min late", "doctor’s note received") — parents can see it too.
- 4Joining a live lesson captures attendance automatically: the record appears with an "auto" badge, with the joined and left times. Simply signing into ZURI-CHALK never counts as attendance.
- 5Save the register as a draft while the day runs, then tap Submit register to lock it. After submission, changes need a reason and are kept in an edit log.
- 6Tap a learner’s bell to notify their parent — in-app first for signed-in parents, then WhatsApp — and export the register as CSV or a print-ready PDF.
Real example
Grade 5A · Tuesday: 24 Present (11 auto-captured from the live lesson), 1 Late with "bus delay", 1 Absent — notify that parent, then Submit register.
TipThe register powers each learner’s attendance rate on the parent’s dashboard, so submit it daily.
5
Annual teaching plan (ATP)


- 1Open the ATP tracker from the teacher menu and pick a class and term.
- 2Add one row per teaching week straight from your subject's ATP — topic plus any planning notes.
- 3As the term runs, mark each topic Taught, Moved (to a later week) or Skipped, so the plan always reflects reality.
- 4Turn any planned topic into a lesson with one tap — the lesson is linked back to the topic automatically.
Real example
Term 2 · Week 3 · Fractions: equivalent fractions and comparing · Status: Taught — then "Plan lesson" straight from that row.
TipThe ATP tracker is your progress safety net: at week 6 you can see at a glance which topics slipped and need catching up.
6
Lessons & tasks


📘 Lesson planning
Build a lesson with objectives, prior knowledge, explanation, a worked example, activity, worksheet, differentiated support, extension work and exit questions. Use the AI lesson-plan assistant to draft any section from a topic and grade — then edit freely.
📝 Tasks
Create a task with instructions, due date, total marks and an optional attachment. Publish it and it appears instantly on every enrolled learner's dashboard — with a notification on their bell.
🗂 Class list
The Learners tab on each class is the permanent class list — attendance, marking, portfolios and reports all draw from it, all year.
🗓 Calendar
Add term dates, exams, meetings and school events to the shared school calendar — everyone in your school sees them, and the next events surface on every Today screen.
Real example
Lesson: Introduction to fractions — what a fraction is, halves and thirds, with a worked example on the board plan and textbook p. 48 as homework.
TipKeep lessons as drafts while you build them; publish only when they're ready — publishing is what notifies learners.
7
Weekly timetable

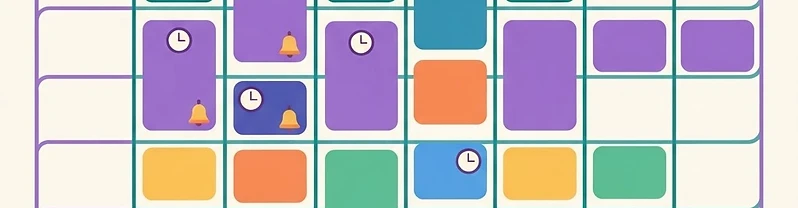
- 1Open Timetable from the teacher menu and switch between three views: My Week, By Class and By Subject.
- 2Add a slot by picking the class, subject, day, start and end time — plus an optional room and notes.
- 3Fixed activities like breaks, assembly or staff meetings are school-wide slots with no class attached.
- 4Edit or remove a slot any time — the grid updates instantly for you and every colleague in the school.
- 5Tap "Add to my calendar" to download your week as an .ics file — it imports straight into Google, Outlook or Apple Calendar, with your school's upcoming events included.
Real example
Mon 08:00–08:30 Break · Mon 08:30–09:15 Grade 5A Mathematics, Room 4 · Wed 14:00 Staff meeting.
TipPlan the whole week in one sitting — the timetable also powers your Today dashboard, so you always know what is on now and what comes next.
8
Worksheets


- 1Build a worksheet from three question types: multiple choice and true/false mark themselves automatically; short answers wait for your own marking.
- 2Write the correct answer for every auto-marked question — the learner's multiple-choice score is calculated the moment they hand in.
- 3Publish the worksheet — it lands on your class's learners with a notification, and their submissions start appearing here.
- 4Open a worksheet to review submissions and see the class stats: average score, question-by-question performance and who needs help.
- 5Mark the short answers, add a comment per learner, and the final mark appears for the learner and their parents.
Real example
Worksheet: Photosynthesis quick check — 3 multiple choice (auto-marked), 2 short answers for you. Class average 78%, but question 4 at 40% — re-teach that.
Good to knowThe question-level stats show which questions the class found hardest — perfect for planning revision in the next lesson.
9
Assessment planner & guidelines


- 1Open the Assessment planner and pick a class to build its formal assessment profile.
- 2Choose a weighting model — percent (components carry % weights) or points (task marks add to a total) — then add components like Tests, Projects or Tasks.
- 3Under each component, add the required tasks with their due period and marks — this becomes the year plan for that class.
- 4Save the profile as active; your marking and report-card work stays school-based and separate from official external results.
- 5In the Assessment guidelines hub, upload your subject's assessment documents — they're stored for your school and tagged by type so colleagues can find them.
Real example
Mathematics · Grade 7 · Tests 40% · Tasks 30% · Project 30% — with "Term 2 test · 60 marks · Week 8" under Tests.
TipThe profile is your moderation safety net: every formal task is planned, dated and weighted before the term starts, not after.
10
Marking, report cards & portfolios


- 1Open a submission in your Marking queue to see the learner's text answer and/or uploaded file.
- 2Enter a mark and feedback — the learner and linked parent see it immediately, with a notification.
- 3Add standout work to the learner's Portfolio (by category and quarter) so parents can see progress over time, not just marks.
- 4At term end, open Report cards, pick the class and term, and tap Compile marks — each learner's subject averages are built from all marked tasks and worksheets.
- 5Add a personal comment per learner, then publish — the card appears instantly for the learner and their linked guardians.
- 6Use the PDF button on any card to generate a clean, printable A4 report for files or hand-outs.
Real example
Comment: A steady term — Thandi works hard in class and her fractions have improved. Keep practising number work at home. · Term 2 · Mathematics 72% (Level 6).
TipReport cards use the standard 7-level achievement scale (7 = outstanding down to 1 = not achieved) — levels are calculated from the percentages automatically.
Good to knowParents can sign off homework from their side — their sign-off, with the minutes spent and an optional comment for you, appears alongside the submission in your marking view.
11
Live classroom, calendar & materials


- 1On a class page, tap Go live to start an online lesson when the school can't open in person. Give it a title and topic.
- 2Your camera and mic turn on as host; enrolled learners get a "Class is live now" banner with a Join button.
- 3Inside the room: a video grid of everyone in the class, in-session chat, raise-hand, and the ability to mute participants.
- 4End the session when the lesson is done — the live banner disappears for learners automatically.
- 5Attendance is captured automatically from the live room: joined and left times land on the class register with an "auto" badge.
- 6Use Add material on the class page any time to share a short video clip, an uploaded file, or a link (YouTube, Drive, etc.) learners can open from their class page.
Heads upLive sessions aren't recorded. Parents are notified a live class is happening, but joining the room is for enrolled learners only.
12
Little ones (code + PIN sign-in)


Young learners don’t have email — the Little ones page in your menu gives any learner, any grade, a sign-in code and 4-digit PIN instead.
- 1Open Little ones and choose the class — each learner gets a sign-in code (e.g. K7M-3QX) with a PIN.
- 2Tap the share icon to send the sign-in card to the parent — in-app first for signed-in guardians, then WhatsApp, SMS or copy.
- 3Reset a PIN any time, or pause and resume a learner’s access — handy over holidays or if a device wanders off.
- 4The child types the code and PIN on the child sign-in screen and gets their own simple home screen: today’s lessons, worksheets and PLAY games — no email involved.
Real example
Grade R learner Amo’s card goes to mom on WhatsApp; Amo types K7M-3QX plus the PIN and lands on his own home screen.
TipToo many wrong PIN tries locks sign-in briefly — reset the PIN from Little ones to unlock it.
13
ZURI-CHALK PLAY


PLAY is the learning-games corner for Grades R–4: five worlds (Discovery World, Little Learners Kingdom, Clever Explorers, Brain Builders, Knowledge Quest) with tap-friendly games mapped to curriculum objectives.
- 1Open PLAY from your menu — the PLAY Control Centre.
- 2Pick a class, choose a game and assign it to the whole class or specific learners, with an optional note on the objective you want reinforced.
- 3Review progress per learner: stars earned, questions answered and the objectives covered — so you can spot who needs help.
- 4Follow-up ideas suggest what to revise next. Game progress stays separate from formal assessment marks — it’s practice, not grading.
Real example
Assign Fraction Pizza to Grade 3 before the fractions lesson — afterwards the control centre shows who earned stars and who still mixes halves and quarters.
14
Messages


Messages is the in-app inbox for your school — teachers, learners and signed-in parents can all message each other, and the in-app option is always offered before WhatsApp.
- 1Open Messages from the menu to see your conversations and unread counts.
- 2Start a new message to a learner or guardian in your classes, or a fellow teacher in your school.
- 3Class invitations, live-class join codes and attendance notices can all arrive in-app — tap a message to jump straight to the class, the Join page or the parent-link screen.
Good to knowIn-app messaging works only between signed-in accounts in your school — for anyone not yet on ZURI-CHALK, use the WhatsApp option that follows it.
15
ChalkMate oversight


ChalkMate is the built-in AI study helper for your learners. As teacher, you control what it can use and see what it's doing:
- Approve or remove sources in the Approved Source Registry — ChalkMate only answers from material your school has reviewed.
- Review reported errors and withdraw any answer flagged as unreliable.
- ChalkMate never hands over homework answers directly — it gives hints and guiding questions in homework/task mode, confirming only once the learner has attempted the problem themselves.
- Learners can save good ChalkMate answers to their practice evidence — nothing is automatic. You review and approve them in the tutor dashboard, and approved items join their portfolio.
- Each session ends with a learner-friendly wrap-up (what they practised, what to focus on next) that you can approve into their portfolio.
Real example
A learner saves ChalkMate's explanation of equivalent fractions as practice evidence. You open the tutor dashboard, approve it, and it counts as study evidence on their portfolio.
16
Voice notes

- 1On the class page's Voice notes section, tap the mic to record a short spoken message (up to 2 minutes).
- 2Preview it, add an optional caption, then send it to one learner or the whole class.
- 3Play back notes learners send you, and withdraw any note if needed — it disappears from the learner's and parent's view.
Good to knowVoice notes stay school-scoped for safeguarding — the teacher and linked parents can see them, so they're never a fully private channel.
17
Resources, forum & appointments

📚 Resource library
Add vetted links and uploaded files for your colleagues and learners — tagged by subject and grade. Everyone in your school can use them, including the AI tutor.
💬 Staff forum
Share ideas, resources and questions in staffrooms that reach further than your school: My school, Regional, Provincial, your National room (shown with your country's flag) or Global. Posts and replies carry file attachments — and every post and reply has a one-tap Translate button, so a colleague in another country can read it in their own language.
📅 Appointments
Parents request meetings with you. Confirm, decline, or reschedule — the parent sees your decision instantly, and either of you can cancel.
Real example
Resource: Siyavula Grade 7 Maths practice — a link tagged Mathematics, Grade 7. Appointment: "I'd like to discuss Amo's maths marks" — confirm for Thursday 14:00.
18
Chalky AI Learning Studio

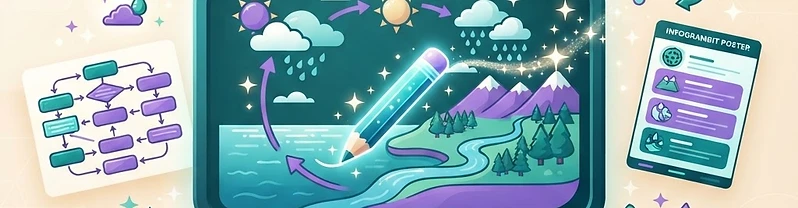
The AI Studio in your menu turns one topic into ready-to-teach resources. Enter the subject, grade and topic and Chalky analyses it, recommends the tools that suit it best — or pick any of the 12 tools yourself. Every visual tool also draws a clean, age-appropriate illustration to match.
- 1Enter the subject, grade and topic (e.g. Natural Sciences · Grade 7 · The Water Cycle), then tap "Analyse topic & recommend tools".
- 2Chalky suggests the 3–5 tools that fit the topic best, each with a one-line reason and exactly what it will produce — plus a suggested flow for combining the tools in a lesson.
- 3Tap "Use this tool" on a suggestion, or pick any tool from the full grid of 12. Generation can take up to about 30 seconds — a timer with a progress note shows Chalky is working, not frozen.
- 4Not quite right? Type a change in the Refine box (e.g. "simpler language" or "add a worked example") and Chalky regenerates the resource with your instruction applied.
- 5Save good resources to My library, Copy the text into docs or email, download any resource as a PDF to print for offline study, and reload saved resources from the library later — you can delete library items you no longer need.
- 6Shortcut: type a slash command straight into the topic box, like "/DIAGRAM The water cycle", to jump straight to a tool without analysing first.
Real example
Topic: The Water Cycle · /DIAGRAM produces a labelled water-cycle diagram with the exact labels learners copy, plus a teaching summary. Save it to your library, refine it for Grade 5 next year, and reuse it every year.
TipVisual tools (Blueprint, Sketch, Poster layout, Diagram, Cycle, Exploded view, Iceberg and Timeline) also generate an illustration — that's why they can take a little longer than the text-only tools.
| Tool | What Chalky creates |
|---|
| 🧩 Blueprint | Breaks the topic into its parts, connections and functions — how each component works and links to the others. |
| 🗺️ Roadmap | An ordered lesson sequence, study pathway or revision plan, step by step — your teaching route through the topic. |
| 🔍 X-Ray | Reveals the internal workings, hidden causes and relationships behind how something works. |
| ✏️ Sketch | Simple, unlabelled drawings learners copy and label themselves — a ready-made labelling activity. |
| 🎨 Poster layout | A classroom poster or presentation layout, with the exact key labels and wording to place on it. |
| 📓 Handwritten | Notebook-style revision notes and worked examples, laid out like a neat learner's exercise book. |
| 📊 Diagram | Labelled diagrams, flowcharts and concept maps, with the exact terms learners should use. |
| 🔁 Cycle | Recurring processes drawn as a loop — water cycle, food chains, economic cycles, anything that repeats. |
| ⚙️ Exploded view | An object split into its separate components so each part can be studied on its own. |
| 🧊 Iceberg | Visible facts on top, deeper causes underneath — ideal for themes, issues and "what's really going on" topics. |
| ⏳ Timeline | Chronological events and milestones laid out in order, with what happened at each point. |
| ⚖️ Decision matrix | Options compared against criteria and trade-offs in a clear table — great for evaluating choices in class debates. |
19
Billing


TipThere is no sign-up fee. Your monthly fee is set by the grades you teach, and your subscription unlocks only the grades inside the band you choose — pick the band that covers every grade you teach, and access above it stays locked. New teachers get a free 1-month trial before billing starts. You'll get a friendly reminder email 7 days and 1 day before it ends — add your payment method in the Billing area and billing resumes automatically; without one, the account pauses gracefully (your data stays readable) until a card is added.
| Teacher’s grades | Fee |
|---|
| Grade R – 3 | R49/month |
| Grade 4 – 7 | R69/month |
| Grade 8 – 12 | R99/month |
| Learners | Free |